While out antique shopping about a week ago, Krissy brought home a nice Wagner #3 cast iron skillet from an antique mall in Delaware, OH. This particular skillet sat flat with no wobble, and had no immediately visible cracks or chips. Circa 1935 – 1959.
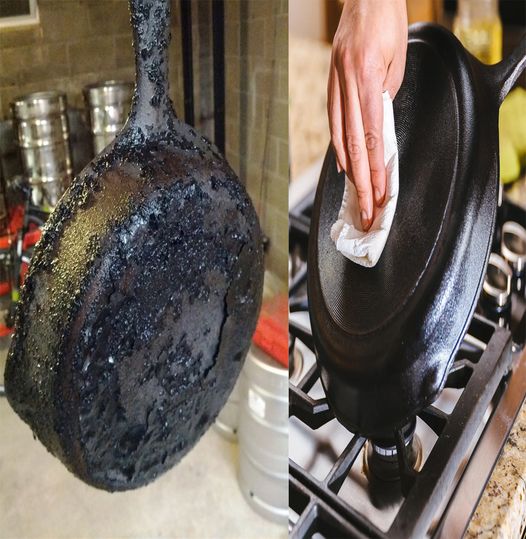
It looked like this when she brought it home:
As you can see, it had years and years of use. There is good iron under all that burnt-on food, rust, and failed seasoning. This #3 will be the subject of our topic in this post.
To start cleaning cast iron with electrolysis, you’ll need these items:
1. A plastic tub, filled with water:
2. At least two steel plates to use as the anode in our circuit. I use diamond plate steel but any scrap steel will do. DON’T use mesh or steel with holes in it! Electrolysis works pretty much “line of site” from your cathode (the skillet) to the anode(s). Using metal with holes in it can cause a “ghosting” image of the steel to come out on the cast iron. I use an 8 gauge wire with metal clamps I got from the hardware store to tie the two anode pieces together. DO NOT USE ALUMINUM! It’s worth noting here that for the anode, you can use a steel drum or tank. Completely surrounding the cast iron piece to be cleaned with the anode metal is best.
3. You’re going to need an electrolyte. Use sodium carbonate at a rate of about a table spoon per gallon of water, maybe less. Note: This is NOT baking soda. Baking soda is sodium bicarbonate.
4. Battery charger. Only a manual battery charger will do. An automatic or trickle charger will not work. I use a 12vdc 15 amp setting but will sometimes set it at 100 amp for a few minutes to get things going. More than 30 or 40 amps is never really needed.
Now that you have your items collected, you’ll need some way to suspend the skillet in the electrolyte solution. NEVER let the cathode and anode metals touch while the battery charger is on or you may be resetting breakers or buying a new battery charger. Below you can see that I use a 1/2″ piece of EMT and a piece of coat hanger to suspend the skillet, and also conduct the circuit. Notice that the negative side of the battery charger is on the skillet, or cathode. Those bubbles you see are hydrogen, use in a well ventilated area! Your water at first will be clear to cloudy white from the washing soda. Mine is orange with rust here because I have already done a few skillets with this water. The solution will last quite a long time and will probably last longer than you can stand to look at it. If you are using a steel drum you will need to line the pipe with rubber hose, or find another way to isolate the circuit. You want the electricity to pass through the electrolyte.